

Data management is at the core of every mobile application in the quick-paced world of app development today. Despite the popularity of cloud-based solutions like Firebase, SQLite excels when you need a straightforward offline local storage solution.
This comprehensive guide will teach you how to create a fully functional Flutter application that is integrated with SQLite. Without an internet connection, you will be able to create, read, update, and delete data (CRUD) locally on the user’s device.
This tutorial will provide you with a solid foundation for working with local databases in your apps, regardless of your level of experience as a Flutter developer.
![]()
![]()
![]()
🧠 What You’ll Discover
After following this tutorial, you will be able to:
- Install SQLite in your Flutter project
- Make local tables and a database.
- Add, edit, and remove data
- Present data in a clear, user-friendly interface.
- Use Snackbars and validation to display user feedback.
This project is straightforward yet useful: you will create a small “Dog Database App” that stores dog names and ages locally on the device.
🛠️ Prerequisites
Before we start, make sure you have:
- Flutter SDK installed (any recent stable version)
- Android Studio, VS Code, or another IDE
- Basic understanding of Dart and Flutter widgets
If you’ve never used SQLite before, don’t worry. This tutorial explains everything clearly and in a step-by-step manner.
⚙️ Step 1: Create a New Flutter Project
Open your terminal or IDE and run:
- flutter create dog_database_app
- cd dog_database_app
This creates a basic Flutter project structure.
🧩 Step 2: Add Dependencies
You’ll need two main packages:
- sqflite → for SQLite operations
- path → to help define database file paths
Add these lines to your pubspec.yaml file under dependencies:
name: sqllite_database_app
description: "A new Flutter project."
publish_to: 'none' # Remove this line if you wish to publish to pub.dev
version: 1.0.0+1
environment:
  sdk: ^3.7.2
dependencies:
  flutter:
    sdk: flutter
  cupertino_icons: ^1.0.8
  sqflite: ^2.4.2
  path: ^1.9.1
dev_dependencies:
  flutter_test:
    sdk: flutter
  flutter_lints: ^5.0.0
flutter:
  uses-material-design: true
Then, run:
- flutter pub get
This installs the required packages.
🗂️ Step 3: Create the Database Helper
In your lib folder, create a new file named database_helper.dart.
This file will handle all database logic. creating tables, inserting, fetching, updating, and deleting records.
Here’s a clean example:
import "package:sqflite/sqflite.dart";
import "package:path/path.dart";
class DatabaseHelper {

  static Database? _database;
  static Future<Database> get database async {

    if (_database != null) return _database!;

    _database = await _initDB("doggie_database.db");

    return _database!;

  }


  static Future<Database> _initDB(String filePath) async {

    final dbPath = await getDatabasesPath();

    final path = join(dbPath, filePath);

    return await openDatabase(

      path,

      version: 1,

      onCreate: (db, version) async {

        await db.execute(

        "CREATE TABLE dogs(id INTEGER PRIMARY KEY AUTOINCREMENT, name TEXT, age INTEGER)",

        );

      },

    );

  }

  static Future<int> insertDog(Map<String, Object?> data) async {

    final db = await database;

    return await db.insert("dogs", data,

    conflictAlgorithm: ConflictAlgorithm.replace);

  }

  static Future<List<Map<String, Object?>>> getDogs() async {

    final db = await database;

    return await db.query("dogs");

  }

  static Future<int> updateDog(Map<String, Object?> data, int id) async {

    final db = await database;

    return await db.update("dogs", data, where: "id = ?", whereArgs: [id]);

  }


  static Future<int> deleteDog(int id) async {

    final db = await database;

    return await db.delete("dogs", where: "id = ?", whereArgs: [id]);

  }

}
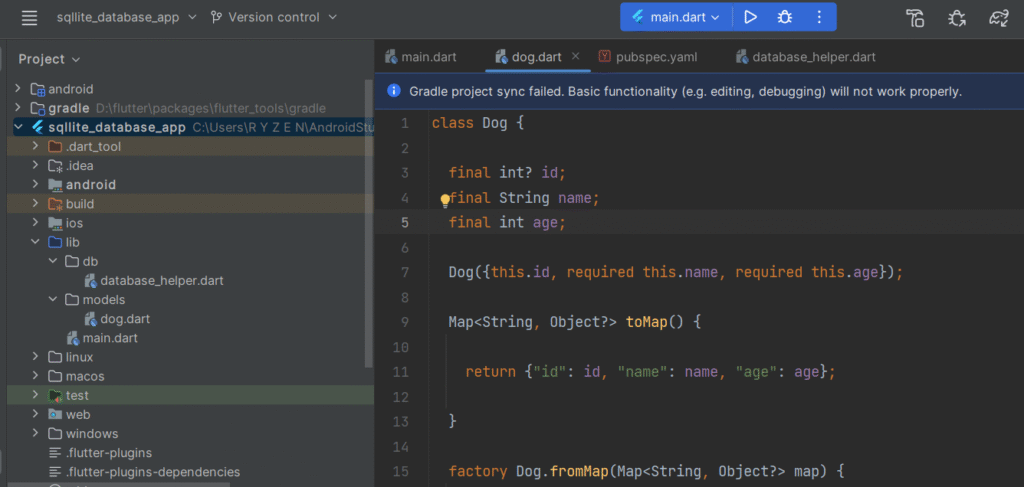
🐶 Step 4: Create the Model Class
Create a file dog.dart in the lib folder.
class Dog {

  final int? id;
  final String name;
  final int age;

  Dog({this.id, required this.name, required this.age});

  Map<String, Object?> toMap() {

    return {"id": id, "name": name, "age": age};

  }

  factory Dog.fromMap(Map<String, Object?> map) {
    return Dog(
      id: map["id"] as int?,
      name: map["name"] as String,
      age: map["age"] as int,
    );
  }

}
🧱 Step 5: Build the User Interface
Now, open lib/main.dart and replace it with the following structure:
import "package:flutter/material.dart";
import "db/database_helper.dart";

void main() {

  runApp(const MyApp());

}

class MyApp extends StatelessWidget {

  const MyApp({super.key});
  @override
  Widget build(BuildContext context) {

    return MaterialApp(

      title: "Dog Database",

      theme: ThemeData(primarySwatch: Colors.teal),

      home: const DogListScreen(),

    );

  }

}

class DogListScreen extends StatefulWidget {
  const DogListScreen({super.key});
  @override
  State<DogListScreen> createState() => _DogListScreenState();

}

class _DogListScreenState extends State<DogListScreen> {

  late Future<List<Map<String, Object?>>> dogs;

  @override

  void initState() {

    super.initState();

    refreshList();

  }

  void refreshList() {

    setState(() {

      dogs = DatabaseHelper.getDogs();

    });

  }

  void _showSnackBar(String message) {

    ScaffoldMessenger.of(context)

        .showSnackBar(SnackBar(content: Text(message)));

  }

  void _openDogForm({Map<String, Object?>? dog}) {

    final nameController = TextEditingController(text: dog?["name"]?.toString() ?? "");

    final ageController = TextEditingController(text: dog?["age"]?.toString() ?? "");

    showDialog(

    context: context,

    builder: (_) => AlertDialog(

    title: Text(dog == null ? "Add Dog" : "Update Dog"),

    content: Column(

    mainAxisSize: MainAxisSize.min,

    children: [

    TextField(controller: nameController, decoration: const InputDecoration(labelText: "Name")),

    TextField(controller: ageController, decoration: const InputDecoration(labelText: "Age"), keyboardType: TextInputType.number),

    ],

    ),

    actions: [

    TextButton(onPressed: () => Navigator.pop(context), child: const Text("Cancel")),

    ElevatedButton(

    onPressed: () async {

    final name = nameController.text.trim();

    final age = int.tryParse(ageController.text.trim());

    if (name.isEmpty || age == null) {

    _showSnackBar("Please enter valid data.");

    return;

    }

    if (dog == null) {

    await DatabaseHelper.insertDog({"name": name, "age": age});

    _showSnackBar("Dog added successfully!");

    } else {

    await DatabaseHelper.updateDog({"name": name, "age": age}, dog["id"] as int);

    _showSnackBar("Dog updated successfully!");

    }

    Navigator.pop(context);

    refreshList();

    },

    child: Text(dog == null ? "Add" : "Update"),

    ),

    ],

    ),

    );

  }

  void _deleteDog(int id) async {

    await DatabaseHelper.deleteDog(id);

    _showSnackBar("Dog deleted successfully!");

    refreshList();

  }

  @override

  Widget build(BuildContext context) {

    return Scaffold(

      appBar: AppBar(title: const Text("Dog Database")),


      body: FutureBuilder<List<Map<String, Object?>>>(

        future: dogs,

        builder: (context, snapshot) {

          if (!snapshot.hasData) return const Center(child: CircularProgressIndicator());

          final data = snapshot.data!;

          if (data.isEmpty) return const Center(child: Text("No dogs added yet."));

          return ListView.builder(

            itemCount: data.length,

            itemBuilder: (context, index) {

              final dog = data[index];

              return ListTile(

                  title: Text("${dog["name"]} (Age: ${dog["age"]})"),

              trailing: Row(

              mainAxisSize: MainAxisSize.min,

              children: [

              IconButton(icon: const Icon(Icons.edit, color: Colors.blue), onPressed: () => _openDogForm(dog: dog)),

              IconButton(icon: const Icon(Icons.delete, color: Colors.red), onPressed: () => _deleteDog(dog["id"] as int)),

              ],

              ),

              );

            },

          );

        },

      ),

      floatingActionButton: FloatingActionButton(onPressed: () => _openDogForm(), child: const Icon(Icons.add)),

    );

  }

}
✅ Step 6: Test Your App
Run your app using:
- flutter run
You’ll see a simple interface where you can add dogs, update their age, or delete them — all data is stored locally using SQLite.
Do you know how to integrate Firebase Database in Flutter?
🧩 Step 7: Wrap-Up
Congratulations! 🎉
You just built a complete Flutter app using SQLite as a local database.
This approach is ideal for offline apps such as:
- Note-taking or To-Do apps
- Expense trackers
- Contact managers
- Small-scale educational apps
For larger projects or cloud sync, you can later integrate Firebase or REST APIs — but mastering local data storage gives you solid ground to build upon.
Keep experimenting and expanding your project—for example, adding search, sorting, or image storage.
🏁 Final Thoughts
Working with SQLite in Flutter is a skill every app developer should know. It’s lightweight, fast, and works perfectly when your app needs to store structured data locally.
Now that you’ve seen how easy it is, try applying this approach to your own idea—maybe a task list, recipe tracker, or inventory app. Keep learning, keep building, and you’ll master Flutter app development in no time.

")

1 Comment
Pingback: Flutter Firebase Authentication Tutorial: Step-by-Step User Login & Signup Guide - onlineskilllab.com