State Management in Flutter 2: Provider vs BLoC vs GetX
Introduction to State Management in Flutter
State management is a core architectural concept in Flutter that controls how data flows and updates the UI.
In Flutter 2, state management ensures:
- Efficient UI updates
- Clean separation of concerns
- Scalable application architecture
Types of State
- Ephemeral State (Local State)
- UI-related (e.g., button toggle)
- App State (Global State)
- Shared across screens (e.g., user authentication)
Why State Management is Important
Without proper state management:
- UI becomes inconsistent
- Code becomes unmaintainable
- Performance degrades
With proper state management:
- UI updates are predictable
- Code is modular and testable
- Performance is optimized
1. Provider in Flutter
Overview
Provider is a wrapper around InheritedWidget, widely used for simple and medium-scale apps.
Features
- Easy to learn
- Lightweight
- Officially recommended by Flutter team
⚡ Advantages
- Simple syntax
- Minimal boilerplate
- Good for small to medium apps
❌ Limitations
- Not ideal for complex business logic
- Can cause unnecessary rebuilds
Want to know in detail, visit below:
Lesson 13: State Management in Flutter Using Provider | Complete Guide with Examples
2. BLoC (Business Logic Component)
Overview
BLoC uses Streams and Reactive Programming to separate UI from business logic.
Concept
- Input → Event
- Process → Bloc
- Output → State
Example
Flutter BLoC Complete Example (Counter App)
Step 1: Add Dependency (yaml file)
dependencies:
  flutter:
    sdk: flutter
  cupertino_icons: ^1.0.8
  flutter_bloc: ^8.1.3
Project Structure
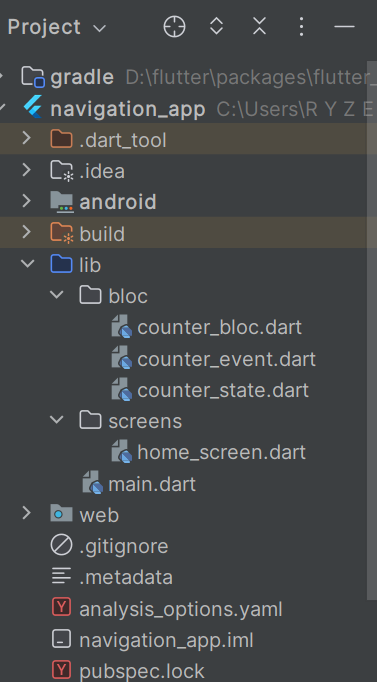
Step 2: Define Events:
bloc/counter_event.dart
abstract class CounterEvent {}

// Increment Event
class IncrementEvent extends CounterEvent {}

// Decrement Event
class DecrementEvent extends CounterEvent {}
Step 3: Define States
bloc/counter_state.dart
class CounterState {
  final int counter;

  CounterState(this.counter);
}
Step 4: Create BLoC
bloc/counter_bloc.dart
import 'package:flutter_bloc/flutter_bloc.dart';
import 'counter_event.dart';
import 'counter_state.dart';

class CounterBloc extends Bloc<CounterEvent, CounterState> {

  CounterBloc() : super(CounterState(0)) {

    // Increment Handler
    on<IncrementEvent>((event, emit) {
      emit(CounterState(state.counter + 1));
    });

    // Decrement Handler
    on<DecrementEvent>((event, emit) {
      emit(CounterState(state.counter - 1));
    });
  }
}
Step 5: UI Implementation
screens/home_screen.dart
import 'package:flutter/material.dart';
import 'package:flutter_bloc/flutter_bloc.dart';
import '../bloc/counter_bloc.dart';
import '../bloc/counter_event.dart';
import '../bloc/counter_state.dart';

class HomeScreen extends StatelessWidget {

  @override
  Widget build(BuildContext context) {
    return Scaffold(
      appBar: AppBar(
        title: Text("BLoC Counter Example"),
      ),
      body: Center(
        child: BlocBuilder<CounterBloc, CounterState>(
          builder: (context, state) {
            return Text(
              "Counter: ${state.counter}",
              style: TextStyle(fontSize: 24),
            );
          },
        ),
      ),
      floatingActionButton: Column(
        mainAxisAlignment: MainAxisAlignment.end,
        children: [

          FloatingActionButton(
            heroTag: "inc",
            onPressed: () {
              context.read<CounterBloc>().add(IncrementEvent());
            },
            child: Icon(Icons.add),
          ),

          SizedBox(height: 10),

          FloatingActionButton(
            heroTag: "dec",
            onPressed: () {
              context.read<CounterBloc>().add(DecrementEvent());
            },
            child: Icon(Icons.remove),
          ),
        ],
      ),
    );
  }
}
Step 6: Main Entry Point
main.dart
import 'package:flutter/material.dart';
import 'package:flutter_bloc/flutter_bloc.dart';
import 'bloc/counter_bloc.dart';
import 'screens/home_screen.dart';

void main() {
  runApp(MyApp());
}

class MyApp extends StatelessWidget {

  @override
  Widget build(BuildContext context) {
    return BlocProvider(
      create: (_) => CounterBloc(),
      child: MaterialApp(
        debugShowCheckedModeBanner: false,
        home: HomeScreen(),
      ),
    );
  }
}
How It Works (Execution Flow)
- User taps button
- Event is dispatched →
IncrementEvent/DecrementEvent - BLoC processes event using
on<Event> - New state is emitted
BlocBuilderrebuilds UI
Best Practices (Important)
- Use separate files for Event, State, Bloc
- Keep business logic inside Bloc only
- Use
BlocBuilderfor UI updates - Use
BlocListenerfor side effects (snackbar, navigation) - Avoid placing logic in UI layer
⚡ Advantages
- Scalable architecture
- Clear separation of concerns
- Testable business logic
❌ Limitations
- Verbose code
- Steeper learning curve
3. GetX State Management
Overview
GetX is a lightweight, high-performance solution combining:
- State management
- Dependency injection
- Navigation
Example
Flutter GetX Complete Example (Counter App)
Step 1: Add Dependency
dependencies:
  flutter:
    sdk: flutter
  cupertino_icons: ^1.0.8
  get: ^4.6.6
Project Structure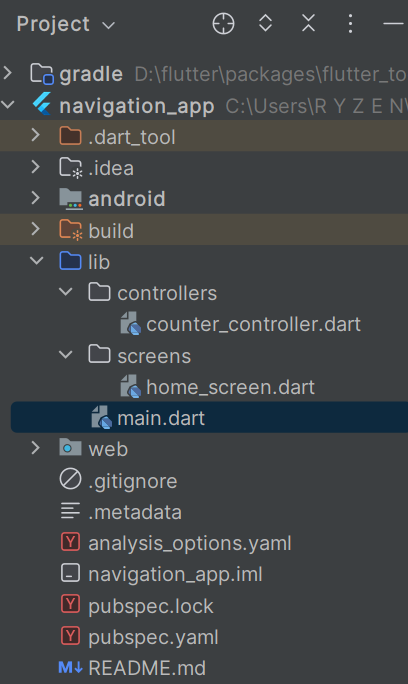
Step 2: Create Controller
controllers/counter_controller.dart
import 'package:get/get.dart';

class CounterController extends GetxController {

  // Reactive variable
  var count = 0.obs;

  // Increment method
  void increment() {
    count++;
  }

  // Decrement method
  void decrement() {
    count--;
  }
}
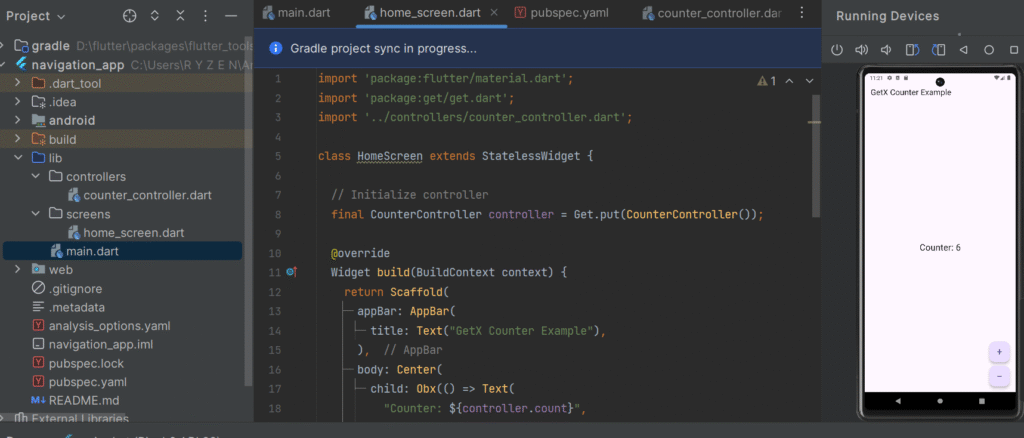
Step 3: UI Implementation
screens/home_screen.dart
import 'package:flutter/material.dart';
import 'package:get/get.dart';
import '../controllers/counter_controller.dart';

class HomeScreen extends StatelessWidget {

  // Initialize controller
  final CounterController controller = Get.put(CounterController());

  @override
  Widget build(BuildContext context) {
    return Scaffold(
      appBar: AppBar(
        title: Text("GetX Counter Example"),
      ),
      body: Center(
        child: Obx(() => Text(
          "Counter: ${controller.count}",
          style: TextStyle(fontSize: 24),
        )),
      ),
      floatingActionButton: Column(
        mainAxisAlignment: MainAxisAlignment.end,
        children: [

          FloatingActionButton(
            heroTag: "inc",
            onPressed: controller.increment,
            child: Icon(Icons.add),
          ),

          SizedBox(height: 10),

          FloatingActionButton(
            heroTag: "dec",
            onPressed: controller.decrement,
            child: Icon(Icons.remove),
          ),
        ],
      ),
    );
  }
}
Step 4: Main Entry Point
main.dart
import 'package:flutter/material.dart';
import 'package:get/get.dart';
import 'screens/home_screen.dart';

void main() {
  runApp(MyApp());
}

class MyApp extends StatelessWidget {

  @override
  Widget build(BuildContext context) {
    return GetMaterialApp(
      debugShowCheckedModeBanner: false,
      home: HomeScreen(),
    );
  }
}
How It Works (Execution Flow)
- Controller is initialized using
Get.put() - Reactive variable (
count) is created using.obs - UI listens using
Obx() - When
countchanges → UI auto updates (no manual rebuild)
Key GetX Concepts Used
| Concept | Description |
|---|---|
.obs |
Makes variable reactive |
Obx() |
Auto UI update on state change |
Get.put() |
Dependency injection |
GetMaterialApp |
Enables GetX features globally |
Best Practices
- Keep logic inside Controller only
- Avoid overusing global controllers
- Use Bindings for large apps (recommended)
- Use
GetBuilderfor non-reactive performance optimization
⚡ Advantages
- Minimal boilerplate
- High performance
- Reactive programming without streams
❌ Limitations
- Less structured than BLoC
- Overuse can lead to poor architecture
Provider vs BLoC vs GetX:
| Feature | Provider | BLoC | GetX |
|---|---|---|---|
| Complexity | Low | High | Very Low |
| Boilerplate | Minimal | High | Minimal |
| Performance | Moderate | High | Very High |
| Scalability | Medium | High | High |
| Learning Curve | Easy | Difficult | Easy |
| Best Use Case | Small apps | Large apps | Rapid development |
Optimization Considerations
Provider Optimization
- Use
Consumerinstead of rebuilding full widget tree - Split models to reduce rebuild scope
BLoC Optimization
- Use
flutter_blocpackage for cleaner architecture - Dispose streams properly to avoid memory leaks
GetX Optimization
- Use
.obsonly where necessary - Avoid global controllers when not needed
When to Use What?
✅ Use Provider when:
- App is small or medium
- You want simplicity
✅ Use BLoC when:
- App is large and complex
- Requires strict architecture
✅ Use GetX when:
- You need fast development
- You want minimal boilerplate
Real-Time Scenario
Imagine a Food Delivery App:
- Provider: Manage cart state (simple)
- BLoC: Handle order processing & API logic
- GetX: Manage UI updates and navigation quickly
Conclusion
State management is the backbone of any Flutter app. Choosing the right approach depends on:
- Application size
- Complexity
- Team expertise
👉 Final Recommendation:
- Beginners → Provider
- Enterprise Apps → BLoC
- Rapid Development → GetX


")