
🚀 Introduction
Firebase Cloud Messaging (FCM) is one of the most powerful and widely used tools for delivering real-time push notifications in mobile applications. For Flutter developers, FCM provides a reliable and scalable solution to send alerts, updates, promotional messages, reminders, and system notifications directly to Android or iOS devices. Because push notifications play a major role in user engagement and retention, integrating FCM into a Flutter app is essential for building modern, interactive, and user-focused applications.
With FCM, developers can send targeted messages to individual users, specific user groups, or entire audiences—all without setting up complex server infrastructure. Its seamless integration with Firebase services like Firestore and Cloud Functions makes it ideal for automating notifications based on real-time database changes, such as new orders, new messages, account activity, or status updates.
In short, FCM is a critical feature for any Flutter project aiming to deliver real-time communication, improve user engagement, and enhance the overall user experience while maintaining a smooth and cost-efficient backend system.
How to Send Push Notifications in Flutter Using Firebase Messaging and Firestore
Push notifications have become one of the most powerful ways to keep users engaged with mobile applications.
Think about apps like WhatsApp, Daraz, Foodpanda, or Facebook. They instantly notify users about messages, offers, updates, and reminders.
If you are building a Flutter app and want to implement this functionality, Firebase makes it incredibly simple.
In this guide, we will learn how to send push notifications in Flutter using Firebase Cloud Messaging (FCM) and Firestore, with practical examples and complete implementation steps.
Why Push Notifications Matter in Mobile Apps
Push notifications help improve:
- User engagement
- Real-time communication
- Customer retention
- App interaction
- User experience
Real-World Example
Imagine you are building a University Assignment Submission App in Flutter.
Whenever a lecturer uploads a new assignment, students should instantly receive a notification:
“New Assignment Uploaded: OOP Lab Task 5 – Submission Deadline Tomorrow”
Without push notifications, students may miss important deadlines.
This is where Firebase Messaging + Firestore becomes extremely useful.
What We Will Build
We will create a Flutter app that can:
✔ Register a device for notifications
✔ Store FCM token in Firestore
✔ Receive push notifications
✔ Display notifications when app is open
✔ Send notifications from Firebase Console
We will build a real-time notification system triggered by Firestore—ONLY for Android.
🔥 Part 1: Setup Firebase Messaging for Android Only
🏗 Step 1: Add Firebase to Your Flutter Android App
Run this command in your Flutter project in the terminal:
-
flutterfire configure
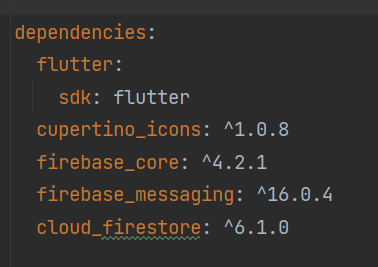
🛠 Step 2: Add Required Dependencies
Add in pubspec.yaml:
dependencies:
firebase_core: ^3.0.0
firebase_messaging: ^15.0.0
cloud_firestore: ^5.0.0
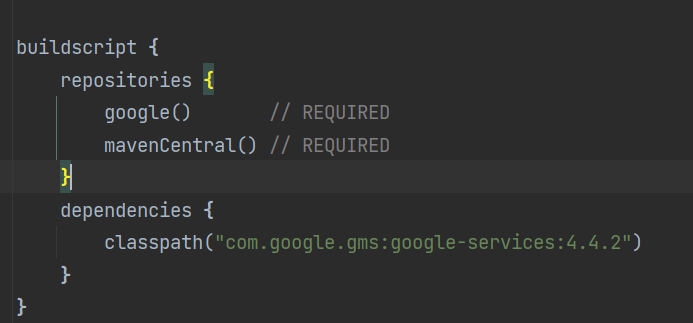
⚙️ Step 3: Android Configuration
1. Enable Firebase in android/build.gradle
buildscript {
    repositories {
        google()       // REQUIRED
        mavenCentral() // REQUIRED
    }
    dependencies {
        classpath("com.google.gms:google-services:4.4.2")
    }
}
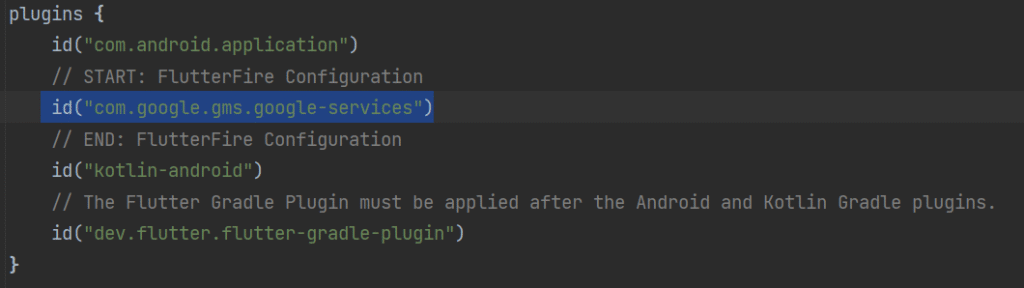
2. Enable Google services in app/build.gradle
plugins {
    id("com.android.application")
    // START: FlutterFire Configuration
    id("com.google.gms.google-services")
    // END: FlutterFire Configuration
    id("kotlin-android")
    // The Flutter Gradle Plugin must be applied after the Android and Kotlin Gradle plugins.
    id("dev.flutter.flutter-gradle-plugin")
}
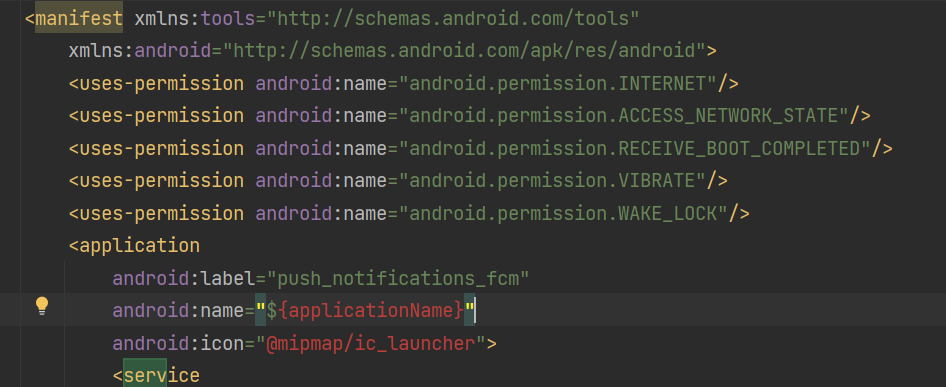
3. Add Permissions in AndroidManifest.xml
Inside:
android/app/src/main/AndroidManifest.xml
<uses-permission android:name="android.permission.INTERNET"/>
<uses-permission android:name="android.permission.ACCESS_NETWORK_STATE"/>
<uses-permission android:name="android.permission.RECEIVE_BOOT_COMPLETED"/>
<uses-permission android:name="android.permission.VIBRATE"/>
<uses-permission android:name="android.permission.WAKE_LOCK"/>
For Android 13+, notification permission is required.
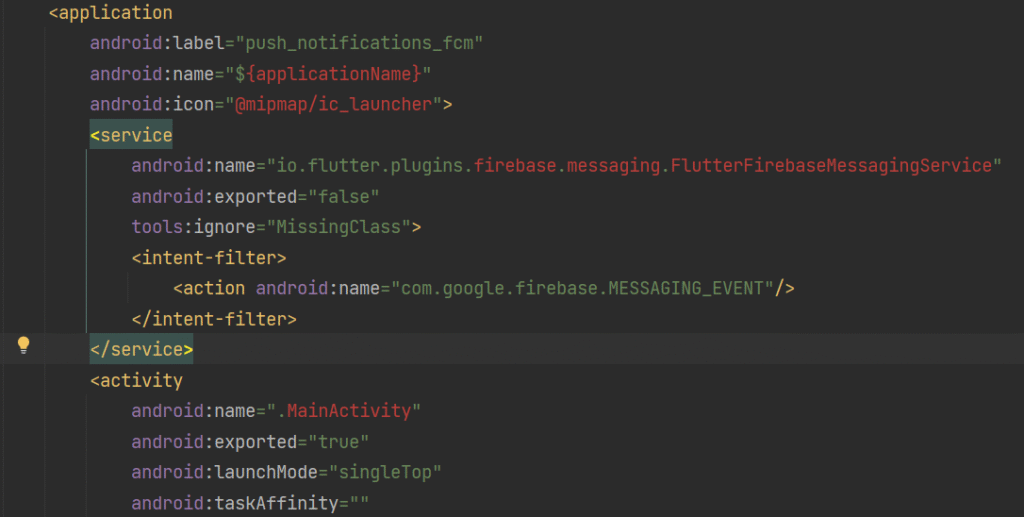
4. Add Firebase Messaging Service Receiver
Inside <application> tag in AndroidManifest.xml:
<service
    android:name="io.flutter.plugins.firebase.messaging.FlutterFirebaseMessagingService"
    android:exported="false"
    tools:ignore="MissingClass">
    <intent-filter>
        <action android:name="com.google.firebase.MESSAGING_EVENT"/>
    </intent-filter>
</service>
🔔 Part 2: Flutter Code for Android Push Notifications
Step 4: Initialize FCM in main.dart
import 'package:flutter/material.dart';
import 'package:firebase_core/firebase_core.dart';
import 'package:firebase_messaging/firebase_messaging.dart';
import 'package:cloud_firestore/cloud_firestore.dart';
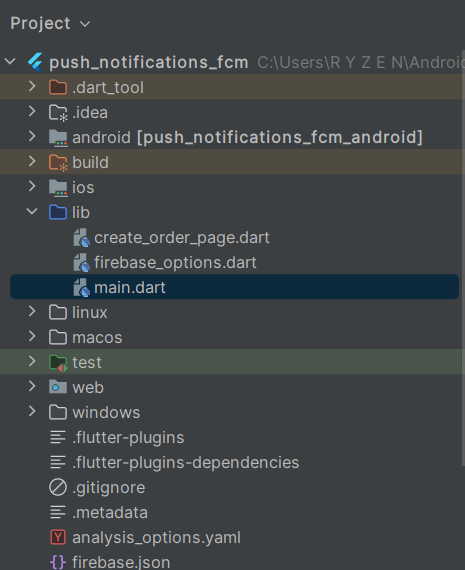
import 'create_order_page.dart';
Future<void> _firebaseMessagingBackgroundHandler(RemoteMessage message) async {
await Firebase.initializeApp();
print("Background Message: ${message.notification?.title}");
}
void main() async {
WidgetsFlutterBinding.ensureInitialized();
await Firebase.initializeApp();
FirebaseMessaging.onBackgroundMessage(_firebaseMessagingBackgroundHandler);
runApp(const MyApp());
}
class MyApp extends StatelessWidget {
const MyApp({super.key});
@override
Widget build(BuildContext context) {
return MaterialApp(
title: 'FCM + Firestore Android Only',
theme: ThemeData(primarySwatch: Colors.blue),
home: NotificationHome(),
);
}
}
class NotificationHome extends StatefulWidget {
@override
_NotificationHomeState createState() => _NotificationHomeState();
}
class _NotificationHomeState extends State<NotificationHome> {
String? token;
@override
void initState() {
super.initState();
initFCM();
}
void initFCM() async {
FirebaseMessaging messaging = FirebaseMessaging.instance;
// Request notification permission (Android 13+)
await messaging.requestPermission(
alert: true,
badge: true,
sound: true,
);
token = await messaging.getToken();
print("ANDROID FCM Token: $token");
// Save token to Firestore
await FirebaseFirestore.instance
.collection('users')
.doc('admin')
.set({'token': token});
// Foreground notifications
FirebaseMessaging.onMessage.listen((RemoteMessage message) {
print("Foreground Notification: ${message.notification?.title}");
showDialog(
context: context,
builder: (_) => AlertDialog(
title: Text(message.notification?.title ?? "Notification"),
content: Text(message.notification?.body ?? ""),
),
);
});
setState(() {});
}
@override
Widget build(BuildContext context) {
return Scaffold(
appBar: AppBar(
title: Text("FCM Push Notifications (Android Only)"),
),
body: Center(
child: Column(
mainAxisAlignment: MainAxisAlignment.center,
children: [
Text("Your Device Token:", style: TextStyle(fontSize: 16)),
SizedBox(height: 10),
SelectableText(token ?? "Loading...", textAlign: TextAlign.center),
SizedBox(height: 30),
ElevatedButton(
onPressed: () =>
Navigator.push(context, MaterialPageRoute(builder: (_) => CreateOrderPage())),
child: Text("Create New Order"),
)
],
),
),
);
}
}
🍔 Real-time Example UI (Order Creation)
import 'package:flutter/material.dart';
import 'package:cloud_firestore/cloud_firestore.dart';

class CreateOrderPage extends StatelessWidget {
  final TextEditingController nameCtrl = TextEditingController();

  @override
  Widget build(BuildContext context) {
    return Scaffold(
      appBar: AppBar(title: Text("Create New Order")),
      body: Padding(
        padding: EdgeInsets.all(20),
        child: Column(
          children: [
            TextField(
              controller: nameCtrl,
              decoration: InputDecoration(
                labelText: "Customer Name",
                border: OutlineInputBorder(),
              ),
            ),
            SizedBox(height: 20),
            ElevatedButton(
              child: Text("Submit Order"),
              onPressed: () async {
                await FirebaseFirestore.instance.collection('orders').add({
                  "customerName": nameCtrl.text,
                  "createdAt": DateTime.now(),
                });

                ScaffoldMessenger.of(context).showSnackBar(
                  SnackBar(content: Text("Order created successfully!")),
                );
              },
            )
          ],
        ),
      ),
    );
  }
}
🎯 Final Output
When you add a new order, Firestore triggers the Cloud Function.
A notification instantly appears on your Android device:
📨 New Order Created!
Order from Ali
Why Use Firebase Messaging with Flutter?
Firebase provides:
✅ Free push notifications
✅ Easy integration
✅ Cross-platform support
✅ Scalable infrastructure
✅ Real-time communication
For Flutter developers, it’s the fastest way to implement notifications professionally.
Final Thoughts
Implementing push notifications in Flutter using Firebase Messaging and Firestore is essential for building modern, interactive apps.
Whether you are creating:
- University portals
- E-commerce apps
- Chat applications
- Task reminder systems
Push notifications significantly improve user engagement.
Start with the basic Firebase Console notifications, then move toward automated Firestore-triggered notifications for production-level apps.
Frequently Asked Questions (FAQs)
Is Firebase Messaging free?
Yes, Firebase Cloud Messaging is free.
Can Flutter send notifications without Firebase?
Yes, but Firebase is the easiest and most reliable option.
Can I send notifications to specific users?
Yes, by storing each device’s FCM token in Firestore.
Does this work on iOS?
Yes, with additional Apple Push Notification setup.
Conclusion
Flutter + Firebase Messaging + Firestore is a powerful combination for creating real-time notification systems.
Once configured correctly, your app can deliver instant updates and create a better user experience.
If you’re building a Flutter app in 2026, push notifications are no longer optional—they’re expected.
🙌 Final Thank You Note
You did it! 🎉
If you enjoyed this guide, don’t forget to subscribe to our blog for more Flutter + Firebase tutorials. More real-world examples are coming soon!

")
