
Advanced UI Design in Flutter (Part 2): ListView Techniques, Item Click Handling & Performance Optimization
Introduction
In modern mobile apps, lists are everywhere—products, users, messages, and notifications. Efficiently displaying and interacting with lists is a core skill in Flutter UI design.
In this advanced guide, you will learn:
-
Different ways of creating ListView
-
Handling list item clicks
-
Managing scrolling performance
-
Real-world Flutter examples
What is ListView in Flutter?
ListView is a scrollable widget used to display a collection of items either vertically or horizontally.
It supports:
-
Static lists
-
Dynamic lists
-
Large datasets
1. Different Ways of Creating ListView
Flutter provides multiple ways to create lists depending on your use case.
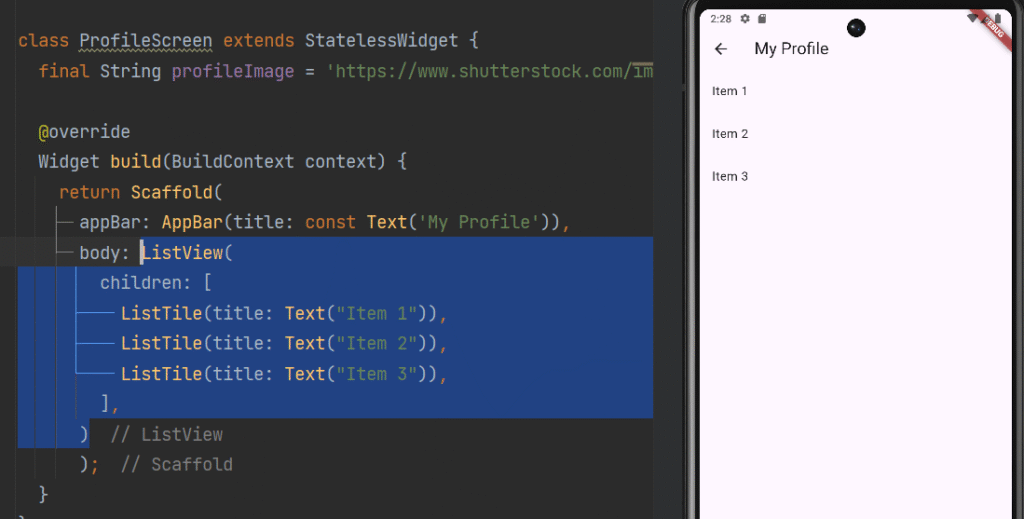
1.1 ListView (Static List)
Used when you have a small number of fixed items.
ListView(
  children: [
    ListTile(title: Text("Item 1")),
    ListTile(title: Text("Item 2")),
    ListTile(title: Text("Item 3")),
  ],
)
✔ Use Case:
-
Settings screen
-
Simple menus
1.2 ListView.builder (Dynamic List)
Efficient for large or dynamic data.
ListView.builder(
  itemCount: 100,
  itemBuilder: (context, index) {
    return ListTile(
      leading: Icon(Icons.person),
      title: Text("User $index"),
    );
  },
)
✔ Advantages:
-
Lazy loading (builds only visible items)
-
High performance
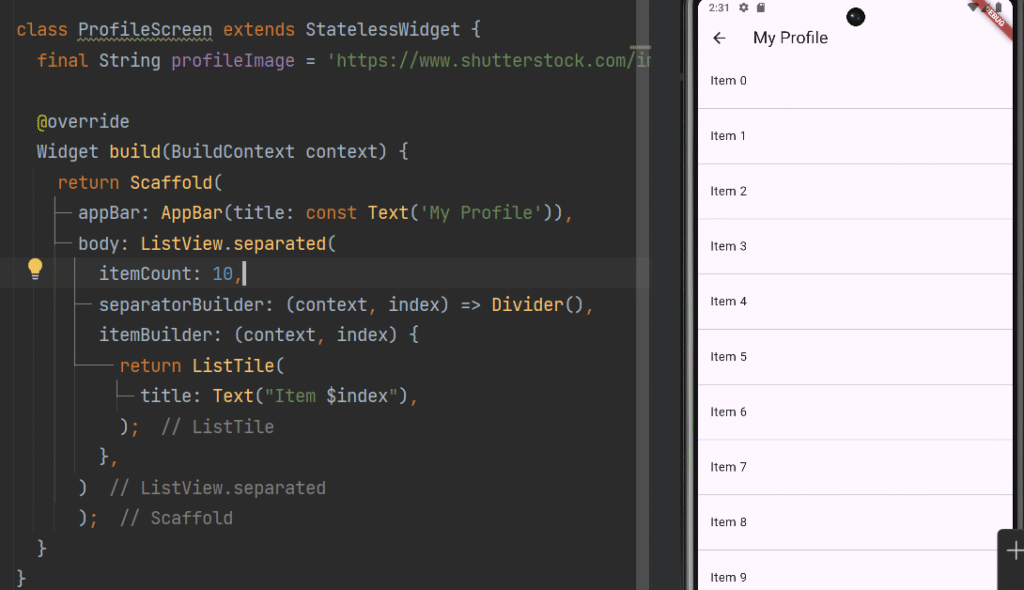
1.3 ListView.separated
Adds separators between items.
ListView.separated(
  itemCount: 10,
  separatorBuilder: (context, index) => Divider(),
  itemBuilder: (context, index) {
    return ListTile(
      title: Text("Item $index"),
    );
  },
)
✔ Use Case:
-
Chat apps
-
Contact lists
1.4 ListView.custom (Advanced)
Provides full control using slivers.
ListView.custom(
  childrenDelegate: SliverChildBuilderDelegate(
        (context, index) => ListTile(title: Text("Item $index")),
    childCount: 20,
  ),
)
✔ Use Case:
-
Complex UI
-
Custom scrolling behavior
1.5 Horizontal ListView
ListView.builder(
  scrollDirection: Axis.horizontal,
  itemCount: 10,
  itemBuilder: (context, index) {
    return Container(
      width: 100,
      margin: EdgeInsets.all(8),
      color: Colors.blue,
      child: Center(child: Text("Item $index")),
    );
  },
)
2. Handling List Item Clicks
Interactive lists are essential for real-world apps.
2.1 Using ListTile onTap
ListTile(
  title: Text("Click Me"),
  onTap: () {
    print("Item Clicked");
  },
)
2.2 Using GestureDetector
For more control over gestures.
GestureDetector(
  onTap: () {
    print("Container Clicked");
  },
  child: Container(
    padding: EdgeInsets.all(16),
    child: Text("Tap Here"),
  ),
)
2.3 Using InkWell (Material Effect)
InkWell(
  onTap: () {
    print("InkWell Clicked");
  },
  child: Padding(
    padding: EdgeInsets.all(16),
    child: Text("Tap with Ripple Effect"),
  ),
)
2.4 Navigate on Click (Real Example)
ListView.builder(
  itemCount: 5,
  itemBuilder: (context, index) {
    return ListTile(
      title: Text("Student $index"),
      onTap: () {
        Navigator.pushNamed(
          context,
          '/detail',
          arguments: "Student $index",
        );
      },
    );
  },
)
3. Managing Scrolling Performance
Handling large lists efficiently is critical.
3.1 Use ListView.builder (Best Practice)
AVOID:
ListView(
  children: List.generate(1000, (index) => Text("Item $index")),
)
USE:
ListView.builder(
  itemCount: 1000,
  itemBuilder: (context, index) => Text("Item $index"),
)
✔ Improves performance
✔ Reduces memory usage
3.2 Use const Widgets Where Possible
const Text("Static Text");
✔ Prevents unnecessary rebuilds
3.3 Use itemExtent for Fixed Height
ListView.builder(
  itemExtent: 60,
  itemCount: 100,
  itemBuilder: (context, index) {
    return ListTile(title: Text("Item $index"));
  },
)
✔ Improves rendering speed
3.4 Avoid Nested ListViews
❌ Wrong:
Column(
   children: [
        ListView(...),
],
)
✔ Fix:
Expanded(
      child: ListView(...),
)
3.5 Use Pagination / Lazy Loading
Load data in chunks instead of all at once.
3.6 Use AutomaticKeepAliveClientMixin (Advanced)
Prevents widgets from rebuilding when scrolling.
3.7 Use RepaintBoundary
Helps optimize rendering for complex UI.
Real-World Example: E-Commerce Product List
// lib/screens/profile_screen.dart
import 'package:flutter/material.dart';

class ProfileScreen extends StatelessWidget {
  final String profileImage = 'https://www.shutterstock.com/image-vector/young-smiling-man-avatar-brown-600nw-2261401207.jpg';

  @override
  Widget build(BuildContext context) {
    return Scaffold(
      appBar: AppBar(title: const Text('My Profile')),
      body: ListView.builder(
        itemCount: 20,
        itemBuilder: (context, index) {
          return Card(
            margin: EdgeInsets.all(10),
            child: ListTile(
              leading: Icon(Icons.shopping_bag),
              title: Text("Product $index"),
              subtitle: Text("Price: Rs. ${index * 1000}"),
              trailing: Icon(Icons.arrow_forward),
              onTap: () {
                Navigator.pushNamed(
                  context,
                  '/detail',
                  arguments: "Product $index",
                );
              },
            ),
          );
        },
      )
      );
  }
}
Best Practices Summary
✔ Use ListView.builder for large lists
✔ Use ListTile for consistent UI
✔ Use InkWell for material effects
✔ Avoid unnecessary widget rebuilds
✔ Implement lazy loading for big data
✔ Keep UI simple and clean
Common Mistakes
❌ Using ListView for large static lists
❌ Nesting scrollable widgets incorrectly
❌ Ignoring performance optimization
❌ Not using builder constructor
Conclusion
Mastering ListView, item interactions, and performance optimization is essential for building scalable Flutter applications.
By understanding:
-
Different ListView methods
-
Click handling techniques
-
Performance optimization strategies
You can create fast, responsive, and professional mobile applications.

")
